User Roles: System Administrator
Last Updated: Jan 02, 2024 9:25 am
The Manage Users option is used to add, delete, or update HRMS users and/or their roles within the HRMS system.
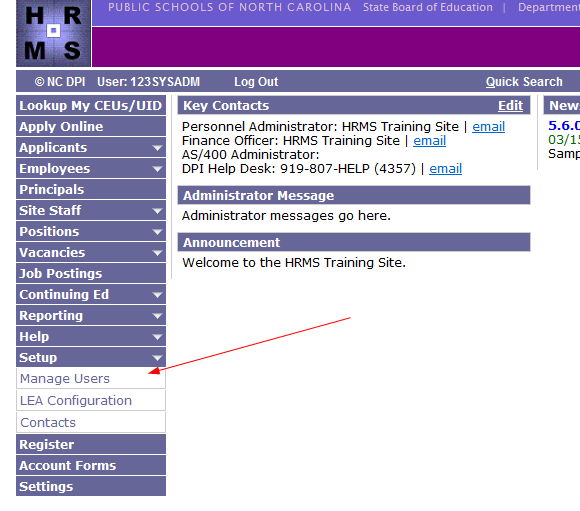
From the HRMS Home page, select "Setup", "Manage Users".
Note: A user must be registered before you can "manage" user access.
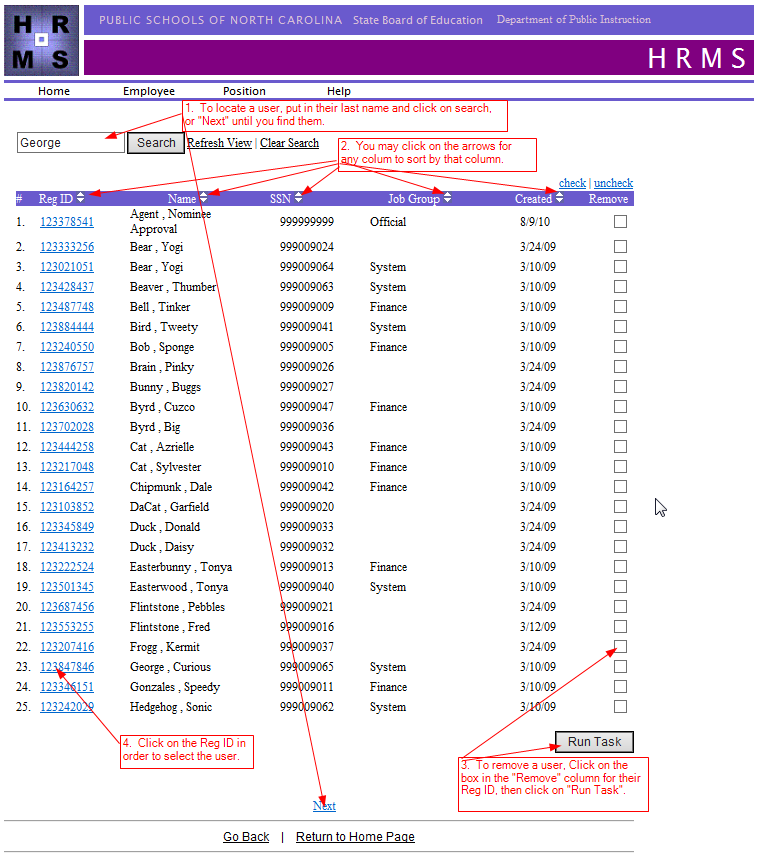
After selecting "Manage Users", a listing of registered users appears. You can:
- Locate the Registrant by using the Search Feature or Next (at bottom of page) option.
- Sort by any column (Click on the up/down triangles in the column headings).
- Remove a registrant by "checking" the box in the "Remove" column for their registration, then clicking on the "Run Task" button.
- Important: If the user processed staff actions in HRMS, do not remove them. Only uncheck their access.
- The Staff Action archiving process may stop working if there is a missing HRMS user in the pending staff actions
- "Select" the registrant by clicking on their "Reg ID". This will take you to the registrant's account details form. This form has 2 sections.
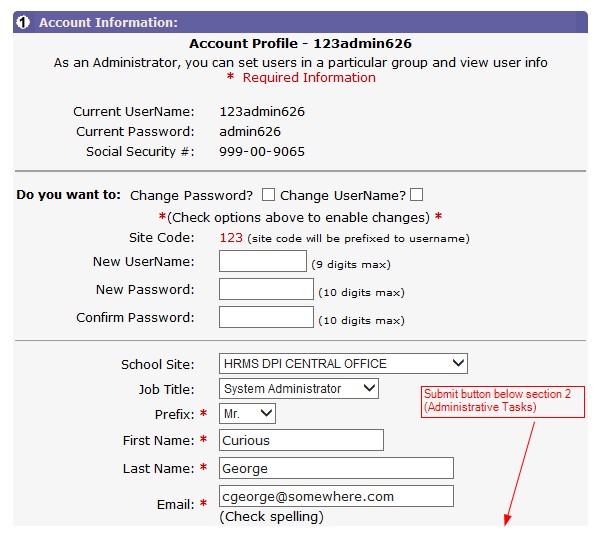
- "Account Information" - Update of UserID, Password, Primary Site, Job Title, Name, or Email Address.
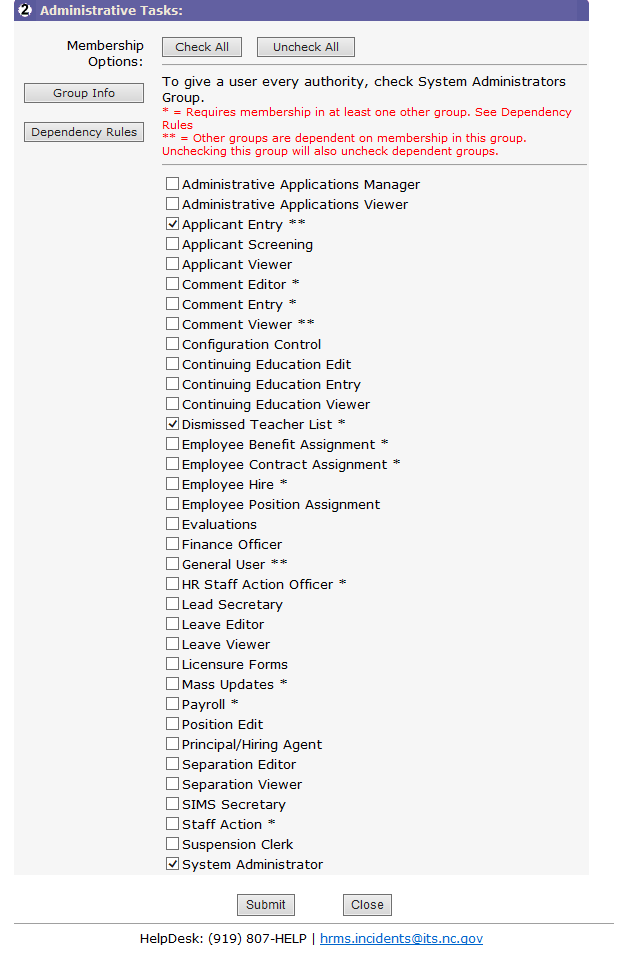
- "Administrative Tasks" - Update of the registrant's system access by selection/de-selection of various "Roles".
Account Information
In the first section on this page, you can perform the following tasks.
- Change UserName (Does not always work correctly so use sparingly. If you have problems, please contact HRMS Support).
- Check the "Change UserName?" box
- Enter a new UserName (without the leading LEA 3 character code)
- Scroll to the bottom and click on the "Submit" button
- Note: The user may need to change the password if unable to access after name changed
- Change Password
- We recommend using the reset password on the HRMS home page as much as possible
- Check the "Change Password?" box
- Enter a new Password in both the "New Password" and "Confirm Password" box
- Scroll to the bottom and click on the "Submit" button
- Change Site, Job Title, Name, Email Address Selections.
- Select new site or job title
- Type over existing name or email address
- Scroll to the bottom and click on the "Submit" button
Administrative Tasks
The second section of the page allows for selection of various "Roles" for the registrant. the submit button.
The following buttons are available for use.
- Check All - Checks all Roles
- Uncheck All - Unchecks all Roles
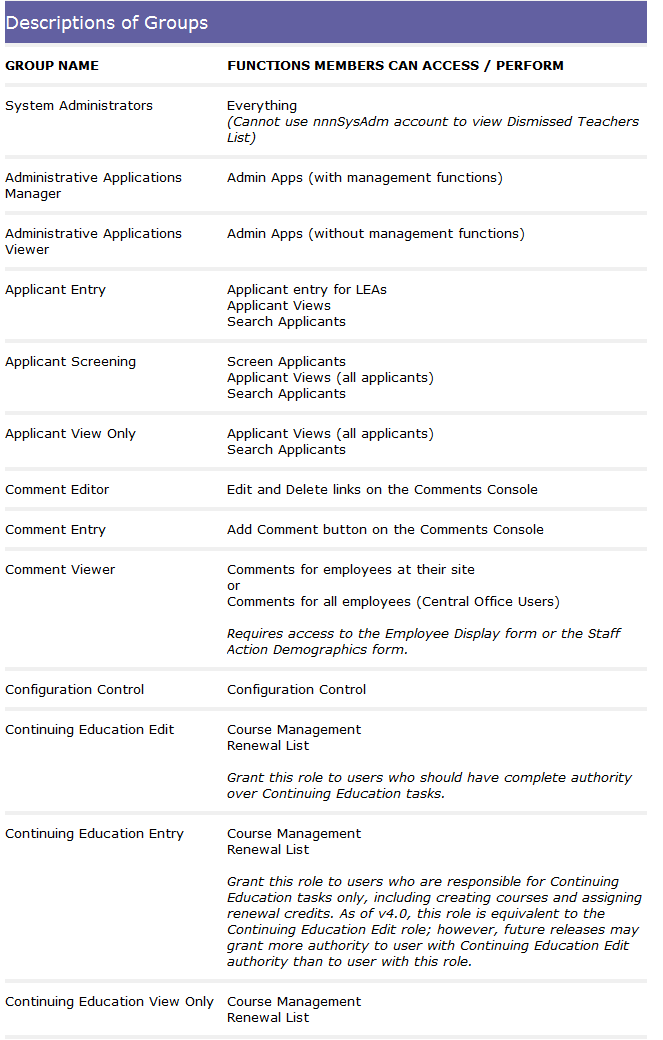
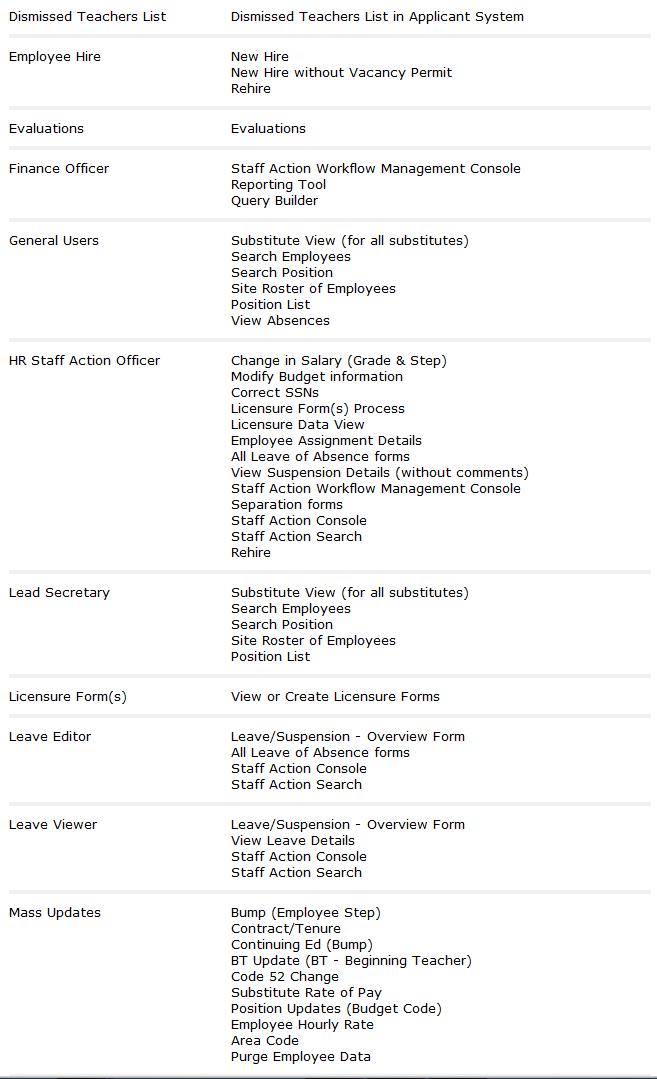
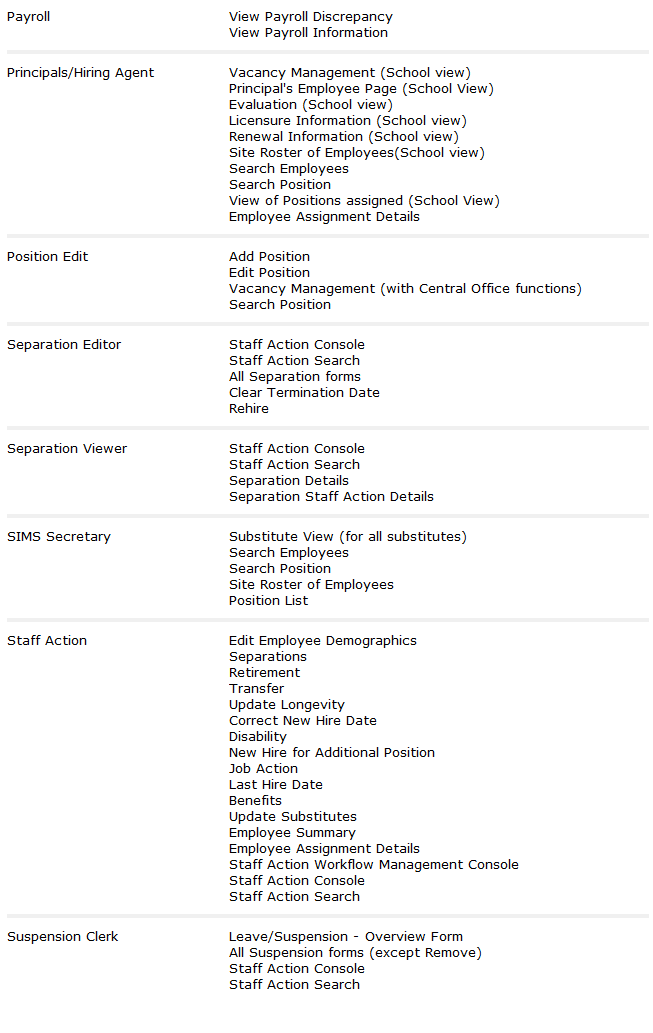
- Group Info - Displays a pop-up window of what options within HRMS are associated with various roles.
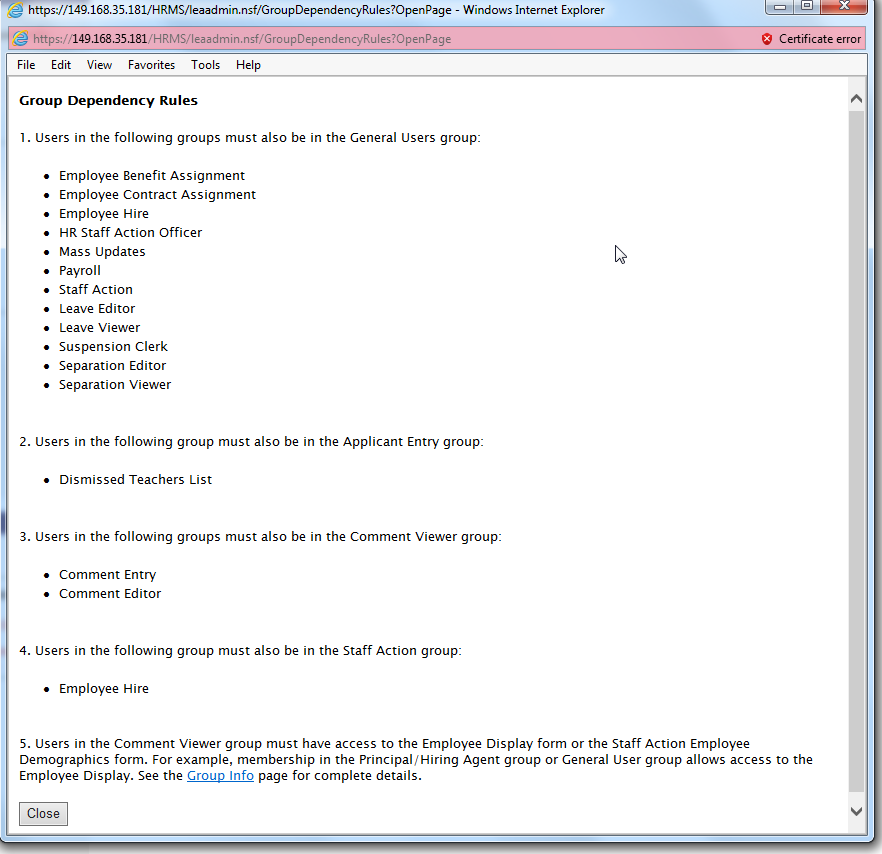
- Dependency Rules - Displays a pop-up window of roles that are dependent upon one another. You will notice when selecting roles, that when some are checked, others are automatically checked.
Note that it make take several seconds to get the confirmation that changes are successful. Also, once the confirmation is displayed, it still may take several minutes for the changes to take effect.
Dependency Rules
Back to Administrative Tasks
Group Info
Back to Administrative Tasks